

Adding custom fields in OpenCart registration form
OpenCart registration forms include predefined fields (name, email, password, etc.). On ruachost.com, you can add custom fields to capture additional customer information without writing any code.
Why Add Custom Fields?
Section titled “Why Add Custom Fields?”- Collect extra details such as company name, tax ID, or preferences.
- Tailor registration forms to your business needs.
- Improve customer segmentation and personalization.
Steps to Add Custom Fields in OpenCart
Section titled “Steps to Add Custom Fields in OpenCart”Step 1: Log in to OpenCart Administrator
Section titled “Step 1: Log in to OpenCart Administrator”- Use your administrator account to access the backend dashboard.
Step 2: Navigate to Custom Fields
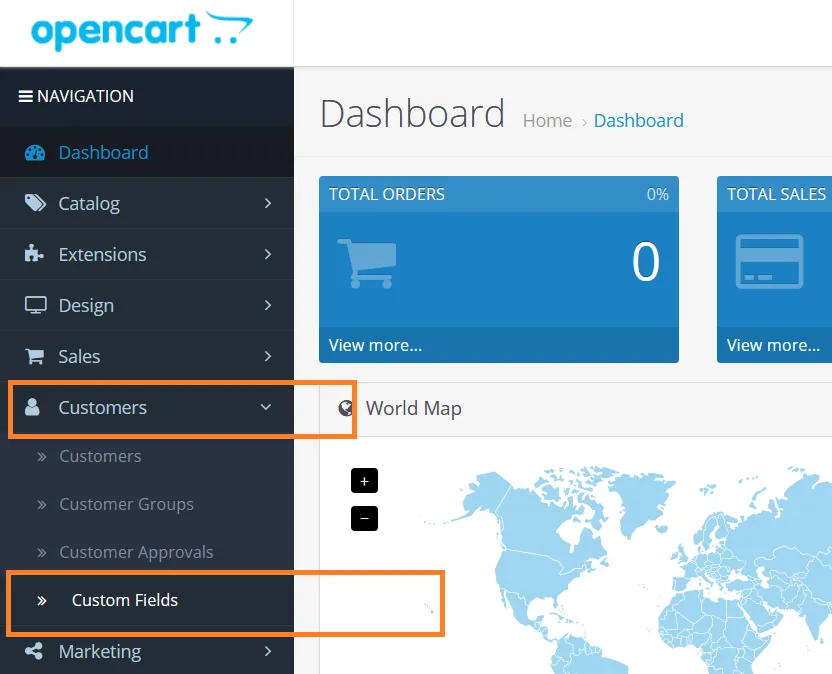
Section titled “Step 2: Navigate to Custom Fields”- On the dashboard, in the left sidebar, click Customers → Custom Fields.
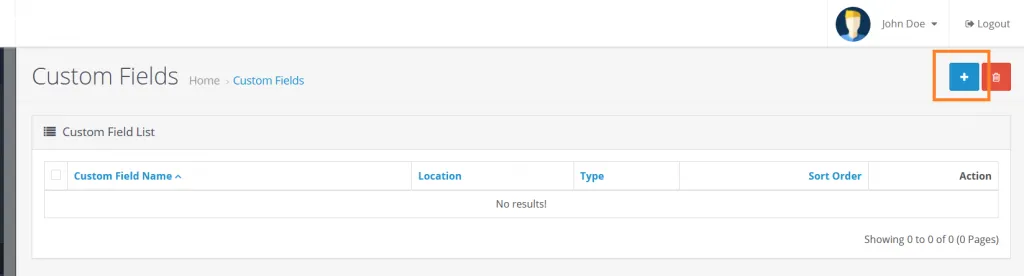
- Click the Add New button.
Step 3: Configure the Custom Field
Section titled “Step 3: Configure the Custom Field”-
Enter the Name of the field (e.g., “Region”).
-
Choose the Location where the field will display (e.g., Account, Address).
-
Select the Type of input (text, select, checkbox, radio, etc.).
-
Fill in other required options such as:
- Customer Group → Assign the field to specific groups.
- Required → Decide if the field must be filled in.
- Status → Set to Enabled.
Step 4: Save and Apply
Section titled “Step 4: Save and Apply”- Click Save to add the new field.
- The custom field will now appear on the registration form.
Example
Section titled “Example”If you add a Region field:
- Customers will see a new input box labeled “Region” during registration.
- The data will be stored in their account profile.