

Adding a navigation menu in WordPress
A navigation menu helps visitors move easily between the important sections of your website. WordPress allows you to create menus and submenus using a simple drag‑and‑drop interface. On ruachost.com, you can add a navigation menu directly from the dashboard.
Why Add a Navigation Menu?
Section titled “Why Add a Navigation Menu?”- Improves site usability and visitor experience.
- Highlights key pages like Home, Blog, Shop, or Contact.
- Supports multiple menu locations depending on your theme.
Steps to Create a Custom Navigation Menu
Section titled “Steps to Create a Custom Navigation Menu”-
Log in to WordPress with an administrator account.
-
In the dashboard, go to Appearance → Menus.
-
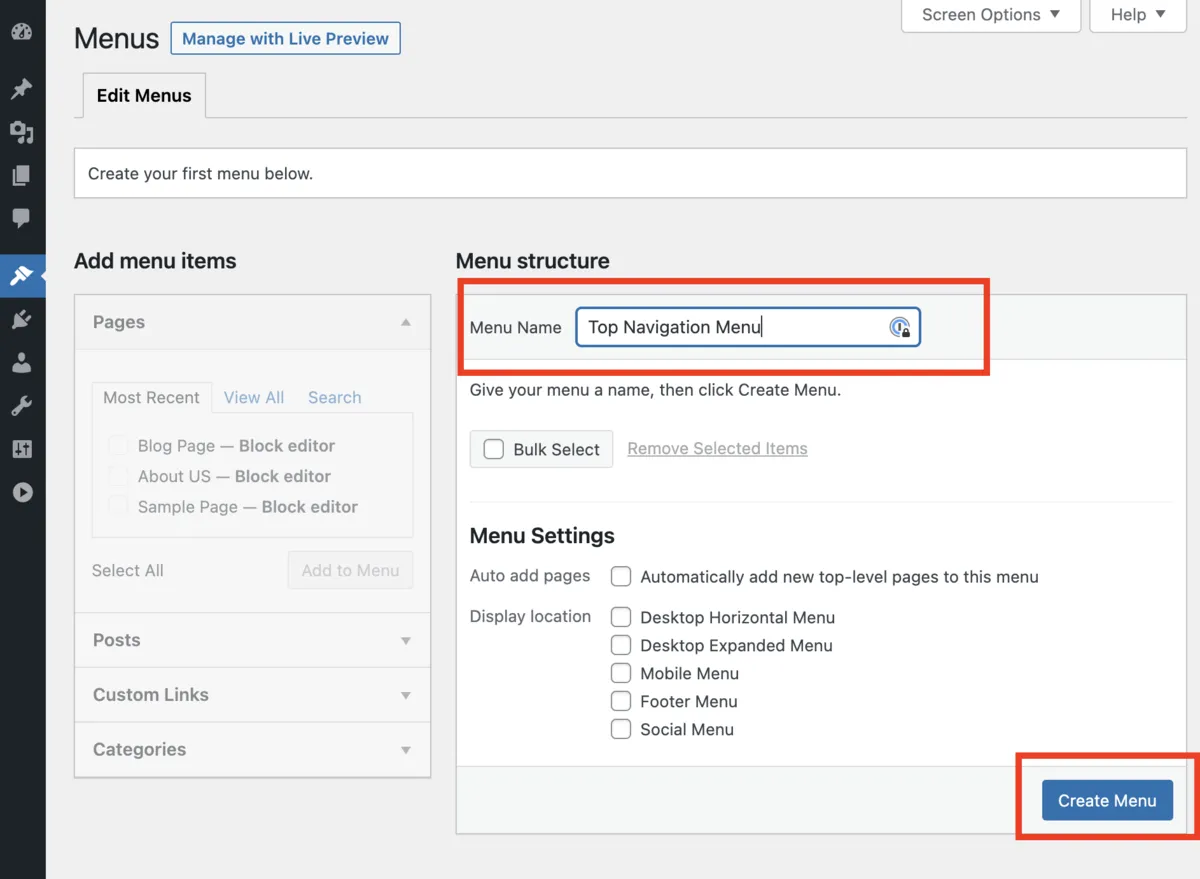
On the Edit Menus tab:
- Enter a name for your menu.
- Click Create Menu.
-
Select the pages, posts, categories, or custom links you want to include.
- Click Add to Menu.
- Click Add to Menu.
-
Use drag and drop to rearrange menu items.
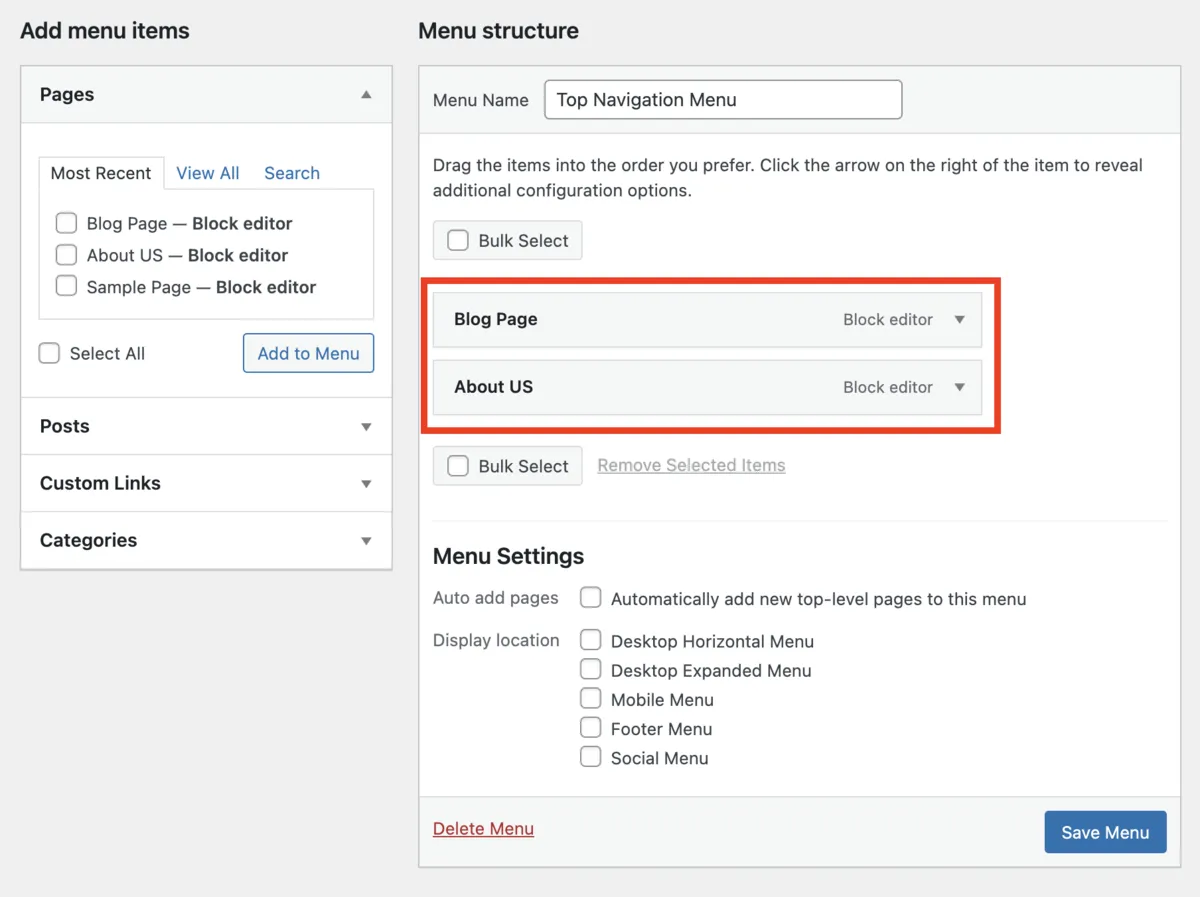
- You can nest items under others to create submenus.
-
Under Menu Settings, choose the location where the menu should appear.
- Menu locations depend on your theme (e.g., header, footer, sidebar).
-
Click Save Menu.
✅ Your navigation menu will now appear on your site.