

Restoring files, email, and databases using JetBackup
JetBackup is integrated into cPanel and allows you to quickly restore files, email accounts, and MySQL databases. You can also download backups to your local computer for safekeeping.
Restoring Files
Section titled “Restoring Files”-
Log in to cPanel.
-
On the Tools page, in the Files section, click JetBackup 5.
-
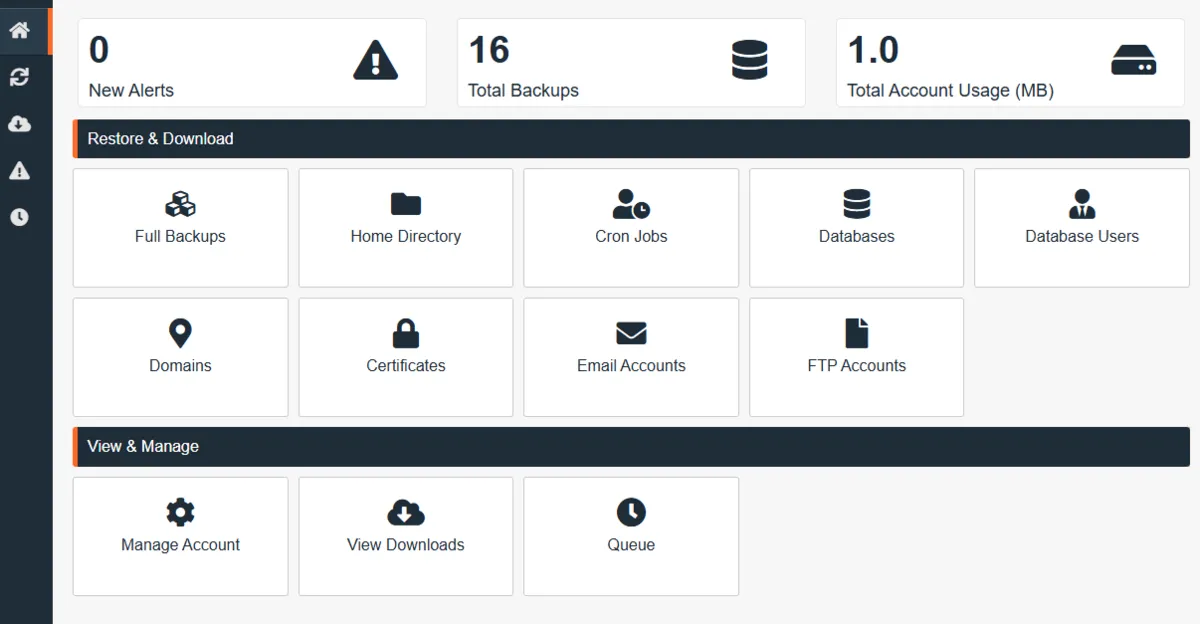
In the JetBackup dashboard, click Home Directory.
-
Select the backup date you want to restore from.
-
Click Change Files Selection → choose folders or individual files.
- Example: Select
public_htmlto restore your website files.
- Example: Select
-
Click Select Files → Restore.
-
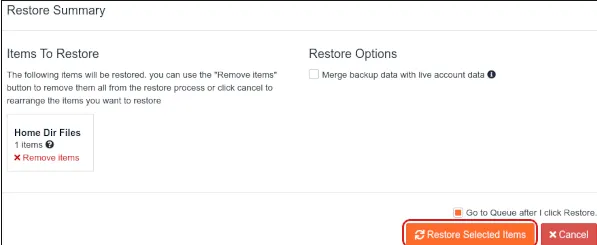
Confirm in the Restore Summary dialog.
-
Track progress under the Queue icon in the sidebar.

-
The Queue page appears, showing a list of all queued jobs and their current status:
Restoring Email Accounts
Section titled “Restoring Email Accounts”-
Log in to cPanel → JetBackup 5.
-
Click Email Accounts.
-
Select the account(s) you want to restore.
- Use Choose Other Backup if you want an older backup date.
-
Click Restore → confirm in the Restore Summary dialog.
-
Monitor progress under the Queue icon.
Restoring MySQL Databases
Section titled “Restoring MySQL Databases”-
Log in to cPanel → JetBackup 5.
-
Click Databases.
-
Select the database(s) you want to restore.
- Use Choose Other Backup to pick a specific date.
-
Click Restore → confirm in the Restore Summary dialog.
-
Monitor progress under the Queue icon.
Downloading Backups
Section titled “Downloading Backups”You can also download backups to your local computer:
- Log in to cPanel → JetBackup 5.
- In the sidebar, click Restore & Download.
- Select the backup you want → click Download.
- In the Download Summary, remove items you don’t want, then click Download Selected Items.
- Track progress under the Downloads icon.
- Once complete, click Download to save the file locally.