

Editing the hosts file on Windows, macOS, and Linux
A hosts file maps hostnames to IP addresses. It is commonly used to test a website before DNS changes propagate.
General Note
Section titled “General Note”The hosts file is plain text. Always use a plain text editor like Notepad (Windows) or nano/vi (macOS/Linux). Do not use a word processor.
Microsoft Windows
Section titled “Microsoft Windows”-
Click Start, type
notepad, right-click, and select Run as administrator. -
Click Yes to allow changes.
-
On the File menu, click Open.
-
Navigate to:
%SystemRoot%\system32\drivers\etc -
In the file type dropdown, select All Files (.).
-
Double-click
hoststo open it. -
At the end of the file, add a new line:
xxx.xxx.xxx.xxx example.comReplace
xxx.xxx.xxx.xxxwith the desired IP address andexample.comwith the domain. Ensure there is at least one space between them. -
Press Ctrl+S to save your changes.
Apple macOS
Section titled “Apple macOS”-
Open Terminal.
-
Type the following command and press Return:
sudo nano /etc/hosts\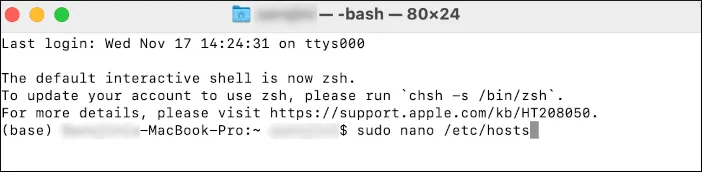 -
Enter your password when prompted.
-
At the end of the file, add a new line:
xxx.xxx.xxx.xxx example.com
- Save changes with Ctrl+O, press Return, then exit with Ctrl+X.
- Clear the DNS cache to apply the changes.
-
Open the
/etc/hostsfile with root privileges using your preferred editor. For example:sudo vi /etc/hosts -
At the end of the file, add a new line:
xxx.xxx.xxx.xxx example.comEnsure there is at least one space between the IP address and the domain name.
-
Save the file.
These steps allow you to map domain names to specific IP addresses locally, which is useful for testing websites before updating DNS records.